
Braag Manor Installation Guide
Installation should be completed by suitably qualified trades and must adhere to any relevant NCC & building requirements.
Installation should be completed by suitably qualified trades and must adhere to any relevant NCC & building requirements.
Pallet: Store on flat pallet at all times.
Temperature: Aim to store at room temperature at all times.
Acclimatization: If exposed to extreme temperatures, allow the product time to acclimatize in the room for 24-48 hours before opening.
Dry Lay: Arrange planks before installation to visualize the pattern.
Mix & Stagger: Mix boards and stagger them for a pleasing design.
Assess During Installation: Do not install faulty or damaged boards.
Report Any Defects: Contact Sunstar Timber Flooring at 1300 081 999 if any product faults are noted.
Clean Surface: Ensure the subfloor is free of debris and structurally sound.
Leveling: Limit rises and falls to a maximum of 3mm over a 1000mm radius. Smooth imperfections to ensure a maximum 1mm deviation over 250mm area.
Ventilation & Humidity: Timber subfloors should be well ventilated and meet building regulations for humidity. Concrete subfloors should not exceed 4.8% moisture.
Maximum Temperature: Never exceed 28°C.
Pre-Installation: Run heating at desired temperature for at least
one week, then turn off and allow subfloor to cool for 2-3 days.
Gradual Heating: Increase temperature by a maximum of 2°C per day. Maintain a constant temperature once running, with variations of no more than 2°C per day.
Confirm Suitability: Check with heating system supplier for suitability of floor coverings; the product warranty does not cover improper installations.
Non-Acceptable Systems: Heating systems between floating floor and subfloor are not suitable.
Unilin system locking process - www.unilintechnologies.com/en/ Flooring/Technologies/Basic-Locking/
Never strike the board directly with tools, always cautiously use an offcut with matching click system, or suitable tapping block taking care not to damage the Unilin tongue & groove system.
Boards should be mixed on the floor and staggered to meet a visually pleasing design.
Allowance for Expansion: Hybrid Flooring expands and contracts with changing seasons and temperatures.
Expansion Gaps: Provide a minimum 10mm gap around the entire perimeter including where it meets any vertical obstructions such as walls, fixed furnishings, plumbing penetrations and flooring transitions.
Large Floor Areas: For floors exceeding 20m in length or 10m in width, consult Sunstar Timber Flooring Technical Team. Additional measures may be required, such as increased expansion gaps.
Product Temperature: Product should always be brought to room temperature prior to installation.
Avoid Fixing Skirtings & Scotia: Do not attach skirtings, scotia or trims to the flooring. Floorings natural movement must be allowed for.
No Caulking or Adhesives: Never caulk the floor or Use adhesive to fix trims to the flooring.
Excessively Heavy Furnishings: Furnishings over 200kg should be approved by Sunstar Timber Flooring Technical team prior to installation.
Click System: The Unilin Click system is a glueless click system and it is not recommended any glue is used to join boards.
Care should be taken if disengaging boards, and any damaged boards should not be reused.
Underlay: Hybrid flooring includes an integrated underlay and foam based underlays should not be used under the flooring. Where improved acoustic controls are required rubber based underlays may be used but should be approved by Sunstar Timber Flooring prior to use.
Stair treads: All stairs should be installed direct stick, and steps should be taken to removed underlay prior to fixing down with adhesive. Where the top stair extends into a upper floating
floor there must be an expansion gap provided. For suitable installation details contact the Sunstar Timber Flooring Technical team.
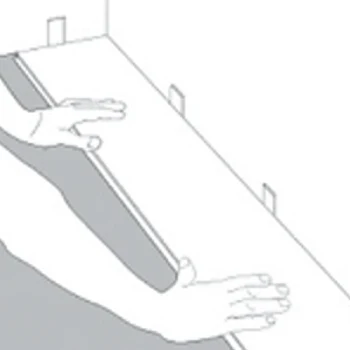
Begin installation from left to right. Install spacers at ends & where planks meet wall
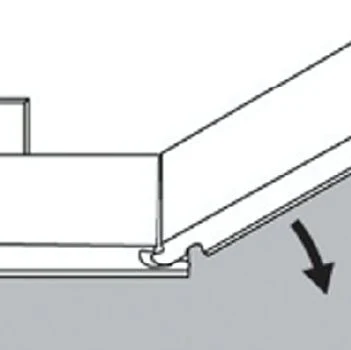
Holding the board at an approx. 30 degree angle lock the short end of board by inserting Unilin tongue into groove & drop into place.
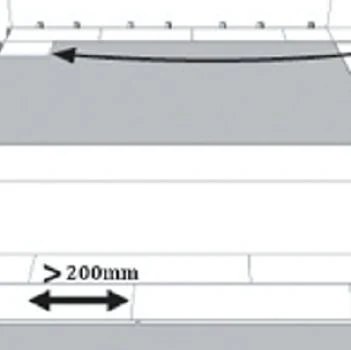
Use the remaining cut piece from the end of a row to begin next row. Ensure end-joints are space by min. 200mm
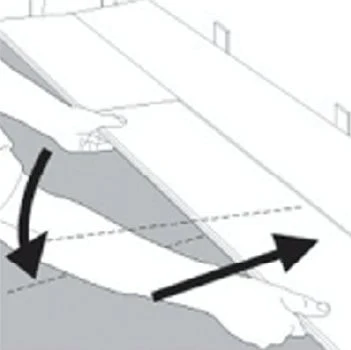
Lock long side of board by inserting tongue into groove at an approxiamate 15 degree angle and drop into place. Next slide towards end of previously installed plank until the tongue touches the groove.
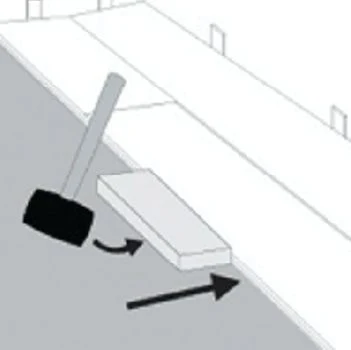
Use mallet and tapping block or scrap piece of board with matching undamaged click tongue to tap long side of board to ensure a tight fit. Tapping block should be minimum 250mm long. Any gaping will compromise the locking system.
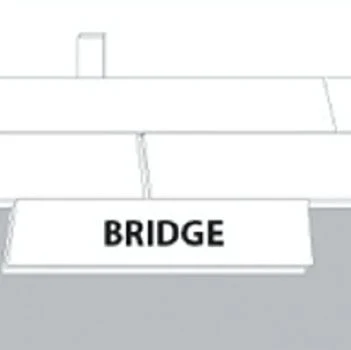
Attach a scrap piece of board to bridge gap between ends of planks.
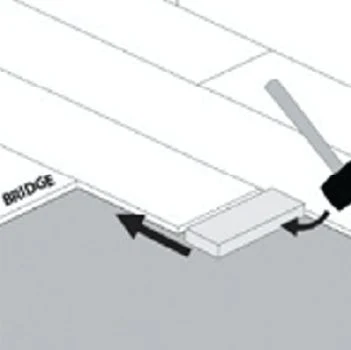
Tap end of board with mallet using a tapping block to lock ends of boards together. Remove support bridge and continue this method until row is complete.
Do not strike the locking system directly. Boards with damage to locking system must be
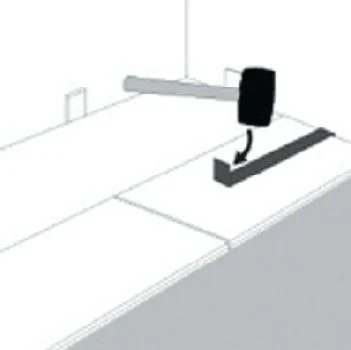
Use mallet and pull bar to lock in final board in row. Insert spacer between end of row and wall to ensure flooring maintains position through full install process.
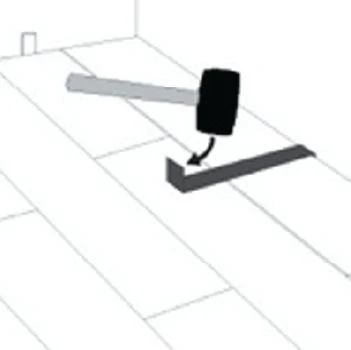
Use mallet and pull bar to lock long side of board on final row.
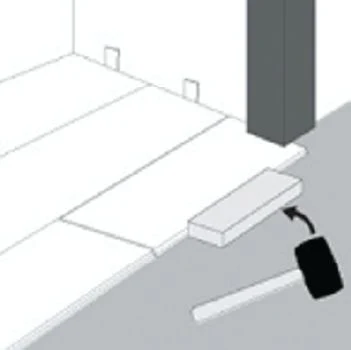
Undercut door jamb to allow board to slide freely under. Tap long side of board using mallet and tapping block to lock in long side.
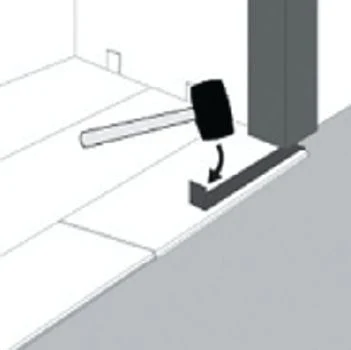
Use mallet and pill bar to tap in and lock short side of board.